


Routing automatic door seal
Description
Automatic door seals are therefore frequently used on entrance doors and for doors in administration, office and school buildings in particular. The advantage of these door seals is that they lower when the door is closed and press a rubber profile down onto the floor. When the door is opened, the rubber profile is raised so that is does not scrape along the floor.
A routing aid can be used to rout the required groove on the underside of the door, which means that there is no need to use a stationary router.
This guide demonstrates how easy it is to use this routing aid and how it can be used to carry out even difficult work in hardly any time.
Tools/accessories

Alternative tools
Preparation/set-up
-
The routing aid and the selected router are set up as follows:
Insert the corresponding cutter into the router. The groove width can therefore be altered for different products.
The routing aid must then be fastened to the router. Two threaded bolts are supplied with the corresponding router for this purpose. When centring the routing aid on the router, it can help to attach a 30 mm copying ring. (This is among the items included with the router.)
-
When measuring for the automatic door seal, the two clearances for the external housing dimensions and the door surfaces must be determined. The door seal should be routed in the rebate area.

-
The clearances must then be transferred to the routing aid scale.
The total clearance for the adjustment leg must correspond exactly to the thickness of the doors so that the router can be guided without play.
-
Next, place the door to be routed on a stable support and, if necessary, secure the support with fastening clamps to prevent slipping.
Now, position the router on the door using the routing aid.
Next, set the routing depth to the required depth. This may vary from product to product.
Now connect the 36 mm suction hose to the cutter.


Procedure
-
During routing, observe the following factors:
The entire routing depth must not be routed in one step. When working with the OF 1400, we recommend proceeding in 10 mm increments. When using the OF 2200, work can be carried out in 15 mm increments. The routing depth of each routing step is heavily dependent on the material. When working with solid oak doors, for instance, the routing depth does not need to be set as deep as for simple internal doors, which usually contain a middle layer made of soft wood. The routing process will need to be repeated a number of times as well.
Always rout in reverse direction. This means that the router infeed is always guided in the opposite direction to the cutter's direction of rotation.
When routing, ensure that the router and routing aid are firmly secured and that the router is guided forwards slowly and evenly.
-
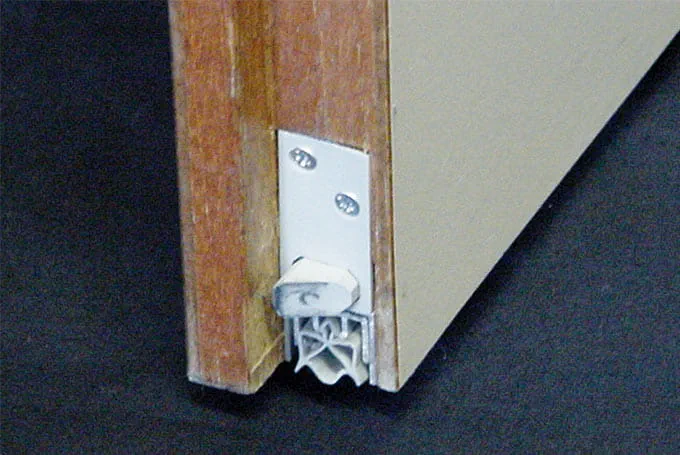
Finally, the correct door seal (e.g. Schall-Ex, Kältefeind, Planet) is screwed into the groove.
Tip: Rout the groove for the fitting 2–3 mm deeper to provide more room for play if the door needs to be shortened to prevent it touching the ground.


-
Our illustrated guides and work results are documented working steps that we have performed in practice. They are individual examples and do not guarantee or promise that users will obtain the same results. The results will depend on the user's experience and skill, as well as the material being used. Illustrated guides do not replace any Festool operating manuals and/or safety instructions. Liability for ensuring that the information, instructions and applications are free from content defects and defects of title, in particular with regard to the absence of defects, correctness, freedom from third party intellectual property rights and copyrights, completeness and fitness for purpose, is excluded. Claims for damages made by the user, regardless of their legal basis, are excluded. These liability exclusions are not applicable if the damage was intentional or caused by gross negligence, or in cases of statutory liability.
We cannot accept liability for damage resulting from defects.↑