Routing decorative grooves to give furniture fronts a framed look

Description
Producing a frame design in furniture front sections involves three distinct work steps. The first step is vertical routing and the second step is horizontal routing. The third work step involves rounding off the outer edges after routing
If you only want to carry out vertical routing, you can of course skip the second step.
Tools/accessories
Alternative tools
Preparation/set-up
-
Carry out the following preparatory work in order to rout a frame design:
For all routing operations, mark the respective cutter centre line and its limitation.
-
Now align the router. Proceed as follows:
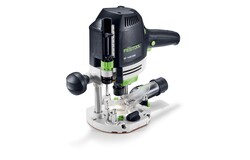
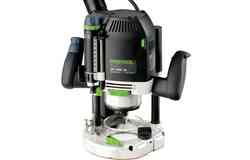
Fit the router with the profile cutter without bearing guide; the router shank should be inserted in the chuck to at least the minimum clamping depth in order to ensure the cutter is held firmly.
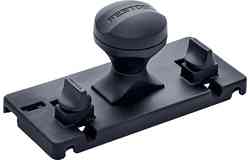
Mount the guide rail adapter on the router so that it can be guided on the guide rail.
Place the router on the guide rail for adjustment.
Set the speed level according to the type of wood, cutter and cutter diameter (please obtain the values from the corresponding table in the Operating Instructions).
-
Clamp the workpiece to be routed on the multifunction table with the help of the clamping elements or clamp clips so that first one of the vertical lines can be processed. The distance x of the marked line to the edge of the guide rail depends on the cutter diameter and is calculated as follows:
x = cutter diameter in mm / 2 + 2 mm
For a 42 mm profile cutter, this gives a distance of 23 mm.
-
Set a routing depth of 8 mm for the profile cutter. Handling of the routing depth setting will not be explained in detail at this point. It is described in the Operating Instructions.
Set the clearance of the router to the rail. When doing this, use the marked lines and the notches in the router table that mark the middle of the cutter precisely.
-
Now guide the tool to the first limitation line and position a guide limiter there. Guide the tool to the end of the milling groove and position the second guide limiter there. Using the limit line marked earlier and the millimetre display on the support, these settings can be adjusted incredibly precisely.
The guide limiter is not necessary for vertical routing.
Procedure
-
Carry out routing as follows:
Set the router down correctly on the rail.
Now switch on the router and plunge into the workpiece. When switching on the router, always ensure that the cutter does not touch the workpiece so that the router can start up freely.
Move the router along the rail, making sure that movement is not too slow because the cutter could otherwise burn the material.
When routing is complete, move the cutter out of the workpiece and then switch it off.
Only take the router down from the rail when the router has come to a standstill.
-
If the vertical cuts are continuous, the guide limiter can be omitted. With the router running, simply plunge into the workpiece and exit the workpiece again at the end of the cut. Otherwise, the same procedure for vertical routing applies as for horizontal routing.

-
For the third work step – rounding the outside edges of the workpiece – the roundover cutter with bearing guide must be clamped in the router.
For this work step, the wood is clamped on the multifunction table so that the user can access two edges.
When adjusting the cutter depth setting, the screw on the bearing guide can be placed on the workpiece and used to set the zero setting. Now set a routing depth for the groove of 18 mm.

-
When rounding over the outer edges of the workpiece, the end grain edges of the workpiece are processed first. Then the longitudinal wood edges of the workpiece are processed.

-
Our illustrated guides and work results are documented working steps that we have performed in practice. They are individual examples and do not guarantee or promise that users will obtain the same results. The results will depend on the user's experience and skill, as well as the material being used. Illustrated guides do not replace any Festool operating manuals and/or safety instructions. Liability for ensuring that the information, instructions and applications are free from content defects and defects of title, in particular with regard to the absence of defects, correctness, freedom from third party intellectual property rights and copyrights, completeness and fitness for purpose, is excluded. Claims for damages made by the user, regardless of their legal basis, are excluded. These liability exclusions are not applicable if the damage was intentional or caused by gross negligence, or in cases of statutory liability.
We cannot accept liability for damage resulting from defects.↑

