Routing and folding plasterboard

Description
Drywalling using plasterboard panels offers a range of benefits for plasterers, painters and drywallers: It produces hardly any dirt, has no moisture load and therefore needs no drying time. Machining is fast and easy, which means this material is cost-effective.
However, almost all work runs into problems because plasterboard panels (PBP) need to be laid around corners (e.g. for wall projections, windows/jambs, pillars).
To do this, PBPs are cut to size and placed directly on top of one another. The places where the panels meet must be filled and sanded. For windows, jambs and pillars, corner rails are usually also fitted, which increases both the duration and cost of the work. Festool’s system solution means that no corner rails or fillers are needed. This saves both time and money.
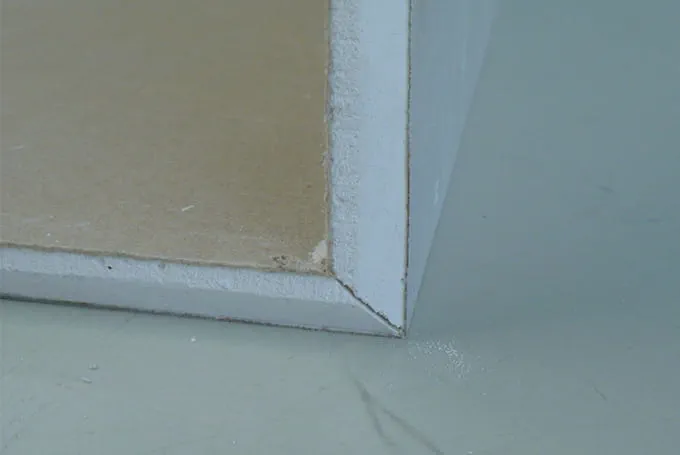
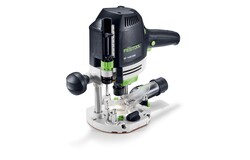
The system solution consists of the OF 1010 router, guide system, V-groove cutter with flattened tip and a dust extractor. A V-groove is routed into the reverse of the PBP; the board layer underneath remains undamaged. The cut-out material provides sufficient space for folding over 90°. The V-groove is pretreated with primer and the two edges are then stuck together using wood glue or white glue. The folded plasterboard panel can then be fitted easily on the corner.
The following material is required:
- Wood glue/white glue
- Primer
Tools/accessories
Alternative tools/accessories
Preparation/set-up
-
Insert the cutter into the router to the mark.
Use the fine settings on the turret stop to adjust the routing depth. The depth must be adjusted so that the lower board layer is not touched or damaged.
Important: The V-groove cutter used here is a special design with a flattened tip!
Fit side support A.
Procedure
-
Marking the plasterboard panel
Place the plasterboard panel on a flat surface and make a mark on the reverse which corresponds to the wall width plus the material thickness. (E.g.: 10 cm + 1.25 cm material thickness = 11.25 cm)
The marked line (M) will be the centre line for the router.
-
Aligning the guide rail parallel to the centre line (M)
Fit the guide rail adapter to the router table and tighten it.
Align the centre mark on the router of the router table (see image, mark C) with the centre line (M) at both ends of the plasterboard panel.
Fasten the guide rail to the panel using fastening clamps.
Position the router on the plasterboard with the guide rail adapter on the guide rail. Position the side support (A) on the PBP and secure.
Set the routing speed to 1.
Connect dust extractor and rout the V-groove in one work step.
-
Adhering the PBP
The routed groove can be used to attach the PBP directly to a wall; additionally, glue can be used to create a stable angle or a box (e.g. for covering a pipe) using the groove.
Procedure:
1. Treat the V-groove with primer and leave to dry for approx. 2 hours.
2. Coat the V-groove with wood glue/white glue and fold the plasterboard panels together.
3. Leave to dry according to the glue manufacturer's instructions.
After routing, it is not always necessary to glue the panel when constructing window jambs and pillars, as the plasterboard panel is screwed into the wall in this instance.
-
Our illustrated guides and work results are documented working steps that we have performed in practice. They are individual examples and do not guarantee or promise that users will obtain the same results. The results will depend on the user's experience and skill, as well as the material being used. Illustrated guides do not replace any Festool operating manuals and/or safety instructions. Liability for ensuring that the information, instructions and applications are free from content defects and defects of title, in particular with regard to the absence of defects, correctness, freedom from third party intellectual property rights and copyrights, completeness and fitness for purpose, is excluded. Claims for damages made by the user, regardless of their legal basis, are excluded. These liability exclusions are not applicable if the damage was intentional or caused by gross negligence, or in cases of statutory liability.
We cannot accept liability for damage resulting from defects.↑


